|
|
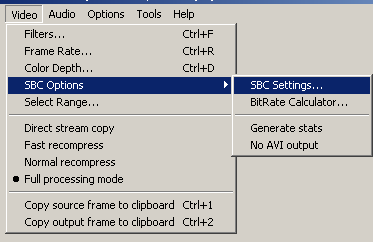
This is the SBC Options Menu - it's the main difference of nandub over virtualdub. All the settings described in here are made within this menu. |
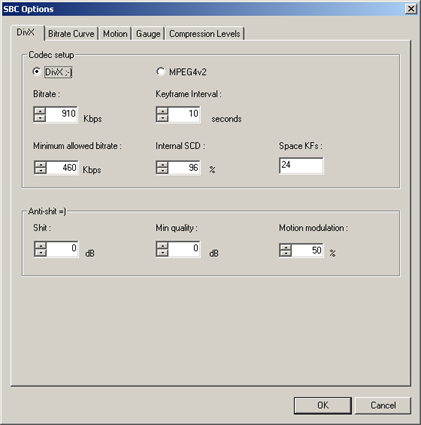 2.1 Codec Choice
 3.1 Motion based curve Modulation
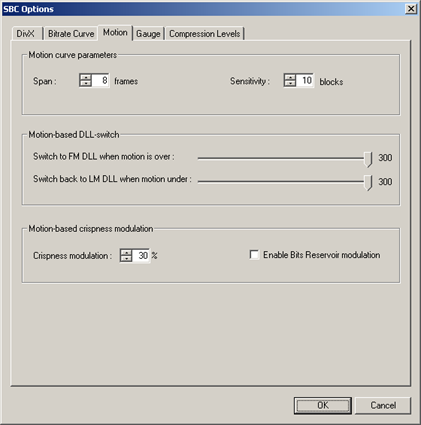
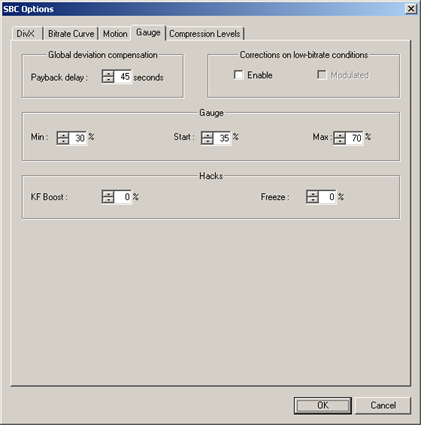 5.1 Payback Delay
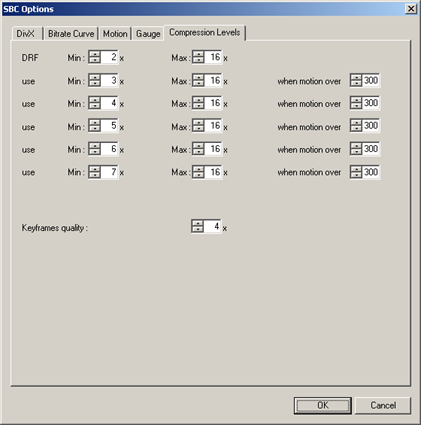 DRF is short for "Detail Removal Factor" and therefore a higher DRF means
higher compression. I always leave the possible granulation untouched and
therefore all "when motion over"-fields at 300 (this disables them as motion
can't go over 299). I just use the Main DRF settings, varying from 2x (min)
to 5x(max). This just works for 2 CD rips or very low motion (bitrate) movies,
you have to raise the Max. value up to 9 (in "hardest cases" even 16!) to
reach your desired filesize.
DRF is short for "Detail Removal Factor" and therefore a higher DRF means
higher compression. I always leave the possible granulation untouched and
therefore all "when motion over"-fields at 300 (this disables them as motion
can't go over 299). I just use the Main DRF settings, varying from 2x (min)
to 5x(max). This just works for 2 CD rips or very low motion (bitrate) movies,
you have to raise the Max. value up to 9 (in "hardest cases" even 16!) to
reach your desired filesize.
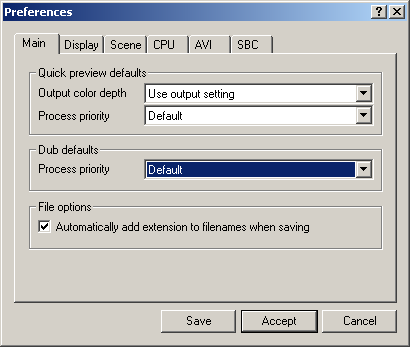 Nando reactewd on the requests of some forum members and added a Dub default
Process Priority. This is useful if you run many programs / tasks at the same
time on your computer and want it to work alone for 2 passes in one go.
Nando reactewd on the requests of some forum members and added a Dub default
Process Priority. This is useful if you run many programs / tasks at the same
time on your computer and want it to work alone for 2 passes in one go.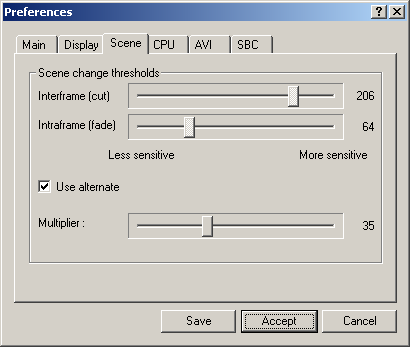 Yaz
explains that alternate SCD works with
Yaz
explains that alternate SCD works with